There are many brands of mold maker out there. Choose the one you like best.
Here is the one I am using "Knead-a-Mold" but then I find that if never used for a long period of time, it takes longer for the mold to harden and does not work so well anymore. There are some takes only few minutes or few hours. Mix equal portion of the mold before kneading them.
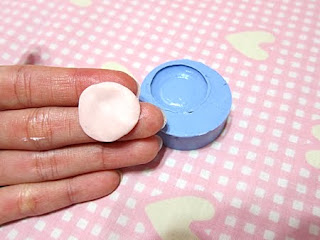
 Once you feel that they are well mixed, get a miniature plate you like and mold the base of it. Instead of the plate facing upward on the mold, make it lays back as in the mold facing top but the plate is at the base. Use a cookie cutter if you like to make the mold look nicer so that it forms a shape.
 Here is how it looks like when the mold is dry. Remove the mold from the cookie cutter and then bend the mold to remove the plate.

 Flatten a piece of clay to a very thin sheet. You can also use a pasta machine and cookie cutter to cut a slightly smaller circle. I am using freehand as demo.
  Use a large ball point tool to make the clay look even on the mold. There are many types of clay you can use. The one I am using here is air dry clay. Benefit of using this type of clay is because after it dries on the mold, it forms a very nice shape. Bad point about it you cannot add in bit by bit of clay like you did with polymer clay. When you remove polymer clay from the mold, the shape is flatten because it needs to be baked. So the choice is still up to you. :)
 Here is the end result of the air dry clay. You can also paint the plate with acrylic paint once it is completely dry. :)
 Hope you like this tutorial and more coming up soon. :)
xx
A.L. Designs
getcraft@aldesigns.com.sg
www.aldesigns.com.sg
www.fayrealm.blogspot.com
www.facebook.com/ald3signs


No comments:
Post a Comment